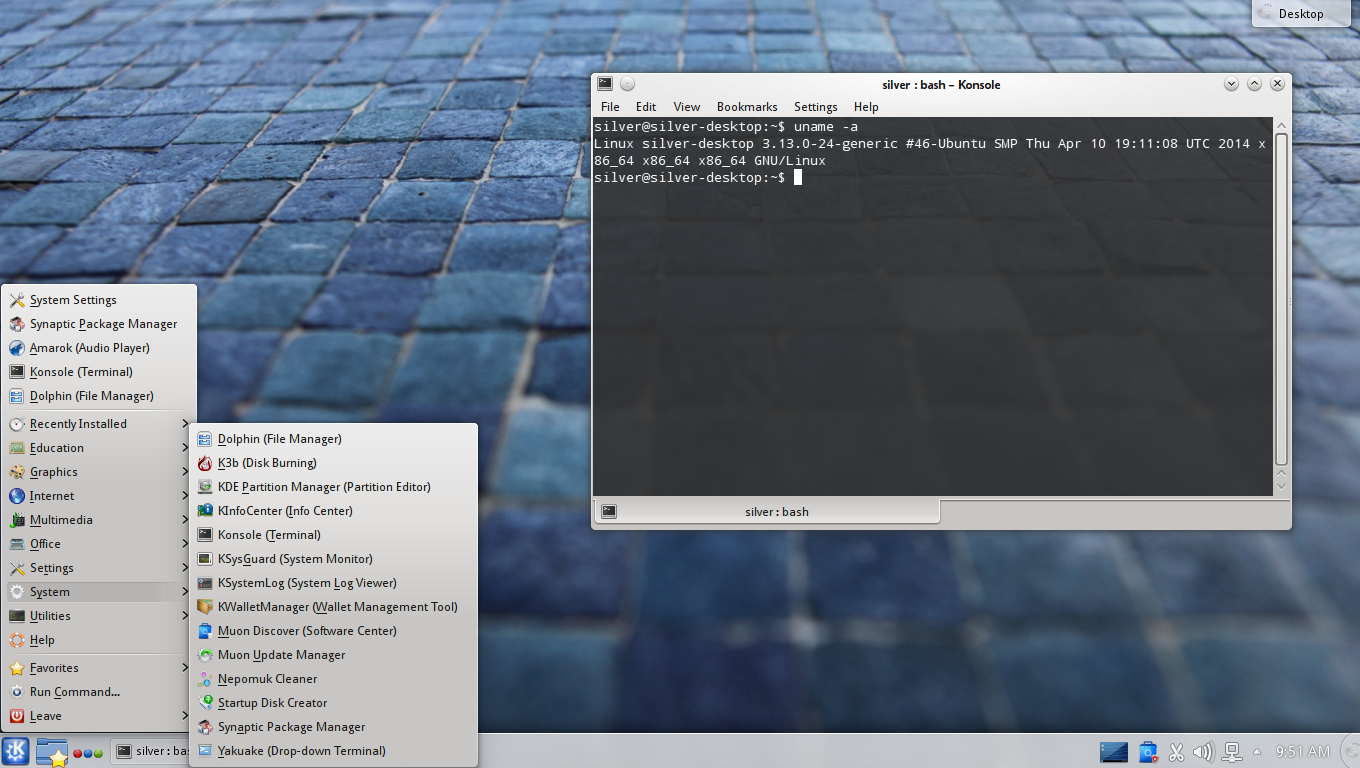
Kubuntu 14.04
Ubuntu 14.04 LTS has been recently released and Kubuntu 14.04 followed up swiftly. Kubuntu is been my primary distro for many years now. It brings together the wonderful KDE desktop along with the app laden Ubuntu.
So if you have just done a fresh install of Kubuntu then you can tweak few things and install some apps to make sure everything from multimedia to office apps and browser functionality works in the best possible manner without any glitches.
1. Update the system
Keeping the system uptodate is necessary to not only get improvements and bug fixes, but also to fix security related issues and bugs.
$ sudo apt-get update
$ sudo apt-get upgrade
2. Install Synaptic package manager, aptitude and gdebi
Kubuntu has the Muon package manager installed by default. In addition to it, you can have the synaptic package manager, which is a very simple and powerful package management tool for ubuntu.
The aptitude command is a great alternative to the apt-get command has a lot more features. The gdebi command allows us to install deb files and pull in dependencies automatically.
$ sudo apt-get install aptitude synaptic gdebi-core software-properties-gtk
The software-properties-gtk command is a gui tool to configure and manage repositories on your Ubuntu system. The Settings > Repositories option inside synaptic package manager would launch it, if its installed. Otherwise it opens a different kind of dialog with very limited options.
3. Get some wallpapers
There is only a single strange looking wallpaper that gets installed with Kubuntu. To decorate the desktop a little more, get some good looking wallpapers from the repository.
$ sudo apt-get install kde-wallpapers
After installing the above package, you should see more wallpapers in the desktop settings dialog.
4. Install rar and unrar utilities
The context (right click) menu in Dolphin allows you to compress files and folders at a single click. However the option to create rar archives would not work until the rar package is installed.
If the rar program is not present on the system, trying to create rar files would give the error message - "Failed to locate program rar on disk."
$ sudo apt-get install rar unrar
The unrar package installs the programs required to uncompress rar archives. Without unrar, Ark (the archive program on KDE) would give the error message - "Failed to locate program unrar on disk."
5. Install Quick Access widget
The quick access plasma widget can be used to navigate the file system and launch the file manager or open any file directly. It is added to the panel.
$ sudo apt-get install plasma-widget-quickaccess
Now right click on the panel and click "Panel Options > Add Widgets...". Search for the widget named Quick Access and add it to the panel.
6. Install some screen savers
The pre-installed screen savers are very primitive looking. So get some good looking screen savers by installing the following package.
$ sudo apt-get install kscreensaver
Go to System Settings > Hardware > Display and Monitor > Screen Locker and select a screensaver. Select one of the OpenGL screen savers. They look pretty cool.
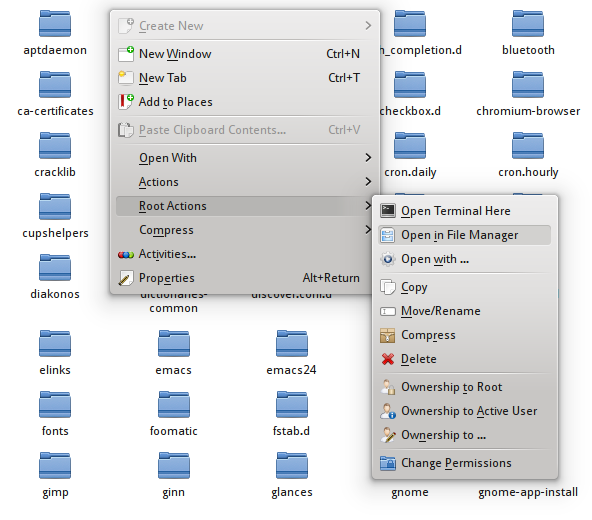
7. Add "Root Actions" service to Dolphin
Whenever you need to open a folder or file with root privileges, you have to run the command with kdesudo. A less complicated way to do it is by adding the "Root Actions" service to dolphin. It would add options in the right click menu, that would allow you to open a folder or file with root privileges with a single click. Ofcourse you would have to type the password, but still is a time saver.
Go to "Configure Dolphin" > Services tab and click Download New Services. Search for root and find the service named Root Actions. Click Install.

After installing it, you should see a new option in the right click menu that allows to open files and folders as root.
8. Install Chromium
Kubuntu comes with Firefox, and you can install Chromium browser which is a faster and more responsive browser. Its the open source version of Google Chrome.
$ sudo apt-get install chromium-browser
If you wish to have Google Chrome as well then download the deb file from http://www.google.com/chrome/ and install it using gdebi.
# 64 bit download and install
$ wget https://dl.google.com/linux/direct/google-chrome-stable_current_amd64.deb
$ sudo gdebi google-chrome-stable_current_amd64.deb

# 32 bit download and install
$ wget https://dl.google.com/linux/direct/google-chrome-stable_current_i386.deb
$ sudo gdebi google-chrome-stable_current_i386.deb
9. Install flash player
The Chromium browser (like Google Chrome) now uses the "Pepper Api" based flash plugin, but it does not include it by default because its not a free software. The following package shall manage the task of doing that.
$ sudo apt-get install pepperflashplugin-nonfree
The pepperflash plugin downloads google chrome and extracts the pepper flash player files and puts them inside Chromium, to enable Chromium to play flash.
Firefox uses the native adobe flash plugin like before. If you had selected "Install this third-party software" during the installation process, then it is installed already. If not then you need to install the following package
$ sudo apt-get install flashplugin-installer
Google Chrome users do not need to install anything, it already has the Pepper API based adobe flash plugin built inside.
10. Install VLC player
This is a must have application in the multimedia category. It can play a large variety video and audio formats in a hassle-free manner without any complains of missing codecs. And yes, its open source and totally free.
$ sudo apt-get install vlc
11. Install restricted codecs
VLC player suffices for playing common audio/video formats. Along with it we can also install the codec packs for various proprietory formats so that other multimedia applications are also able to play as many formats as possible.
If you had selected "Install this third-party software" during the installation, then its already done. If not, then install the following packages.
$ sudo apt-get install kubuntu-restricted-extras libavcodec-extra
12. Playing encrypted dvds
The libdvdcss library (part of the VideoLAN project) can be used to play dvds encrypted with "Content Scramble System" (CSS). To install it, first install the libdvdread4 package and then use the installer script.
$ sudo apt-get install libdvdread4
$ sudo /usr/share/doc/libdvdread4/install-css.sh
The libdvdcss library is also used by VLC player.
13. Install skype
Skype might be an optional app for some users. For video conferencing Google hangouts work pretty well. But when you want to make phone calls, video calls, text chat all from a single desktop application, skype does not have any alternative on Linux.
Get skype from the following url. Choose Ubuntu from the distro list and the download should being automatically
http://www.skype.com/en/download-skype/skype-for-computer/Or download the installation file with wget using the following commands.
# download with wget
$ wget http://download.skype.com/linux/skype-ubuntu-precise_4.2.0.13-1_i386.deb

# install with gdebi
$ sudo gdebi skype-ubuntu-precise_4.2.0.13-1_i386.deb
Skype is now owned by Microsoft, who is not developing it well like the windows version. The reason is probably the size of the userbase which is small on Linux. But still we continue to use it as is.
14. Install Dropbox
Download the Ubuntu deb file from https://www.dropbox.com/install. Make sure to select the correct architecture (64bit/32bit). It will download a 100kb installer deb file. The installer will then download the complete dropbox application and install it.
Install the deb file with gdebi
$ sudo gdebi dropbox_1.6.0_amd64.deb
Find the Dropbox shortcut in the K > Internet menu and launch it. It will ask to download the dropbox daemon which will install the full thing.
The final installation takes few minutes, after which it should be ready to use.
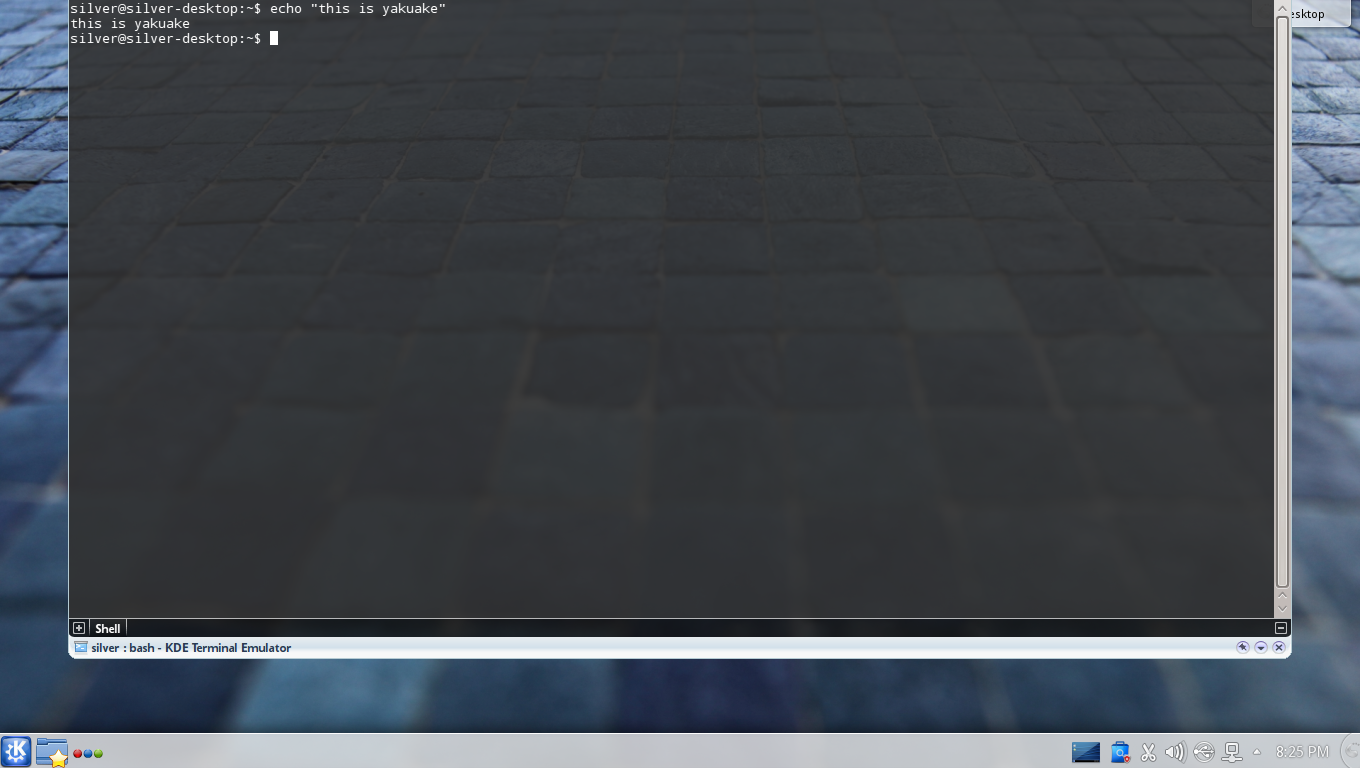
15. Install Yakuake dropdown terminal
Yakuake is a cool dropdown terminal app for KDE. It shows/hides a terminal at the press of a key making it a convenient to access the command line.
$ sudo apt-get install yakuake
Now launch yakuake from "K > System" menu. Yakuake registers the F12 key as the shortcut to show the terminal.
16. Tweak fonts
Kubuntu uses the Ubuntu fonts, which do not look nice at all compared to other fonts like Droid Sans. Distros like Xubuntu and Elementary OS are already using Droid Sans as the default font on desktop.
Sometime back I had developed a simple method to tweak the appearance of fonts and make them look extra-ordinary. It involves using Droid and Noto fonts and configuring anti-aliasing via .fonts.conf file.
Follow this article here
How to get gorgeous looking fonts on Ubuntu
17. Install additional drivers
For certain hardware like Nvidia and AMT graphics cards and Broadcom wireless chipsets, the ubuntu repository provides packages to install the proprietory drivers. These are the official drivers from the respective vendors, and enable the hardware to perform much better than with the free and open source drivers.
It is recommended to install the proprietory drivers for best performance of the hardware.
For instructions on how to install nvidia drivers follow this post -
How to install the latest Nvidia drivers on Ubuntu 14.04 Trusty Tahr
18. Install java browser plugin
The java browser plugin is essential to run applets inside browsers. Most modern websites do not use java applets anymore, but occasionally you might come across some.
To install java browser plugin all you need to do is install the following package
$ sudo apt-get install icedtea-plugin
It installs openjdk-7-jre (java runtime) and other necessary packages. Now the java plugin should work right away in Firefox and Google Chrome. You can test this by going to http://javatester.org/version.html.
19. Make partitions writable
This is really the coolest thing to do after installing any linux distro. The permission system of linux does not allow you to write to other partitions without root privileges.
Most of the time you find yourself opening file managers with a sudo/gksudo/kdesudo. On the desktop, it is sensible enough to have other partitions as writable so that you can access them freely.
Open Dolphin (or your favorite file browser) with root privileges and go into the hard drive partition/usb drive. Right click > Properties > Permissions tab, give View+Modify privileges to owner, group and others.
Check the "Apply changes to all subfolders and their contents" to make sure that new permissions are applied everywhere inside.
If a certain partition is already occupied by files, then you need to run the following command to change permissions on all files on that partition
$ sudo chmod -Rv a+w /media/<uuid>
The last part (/media/
20. Homerun Kicker menu
Homerun Kicker is a plasma widget that opens a menu to find and launch applications similar to the normal K menu that already have. Homerun Kicker is an enhanced version that has a search box and separate list of shortcuts to launch favorite applications.
Install homerun by running the following command.
$ sudo apt-get install plasma-widget-homerun-kicker plasma-widget-homerun
Now right click on your bottom panel, and go to Panel options > add widgets. Search for homerun and add the widget that is named "Homerun Kicker - Non-fullscreen version of Homerun". It should look like this

Summary
By now your Kubuntu system should feel a lot more user friendly. Although we did only some of the most essential tweaks, there is a lot more you can do. For more software apps check out the muon or synaptic package managers and install to your needs.
Check out the System Settings tool to configure the desktop in all possible ways including application preferences, locale settings, visual appearance, hardware configuration, network settings etc. KDE is great at customization.
And if you know of more cool things that can make Kubuntu better, then let us know in the comment box below.
Um. Why is this article rereleased? Pretty sure you wanted to talk about the new 21.04 Kubuntu release and pretty sure you actually have an article done up, unless you’re trying to say nothing has changed in 7 years.
I didn’t know things like root access in dolphin exist. :p Also is there any difference between ubuntu-restricted-extras and kubuntu-restricted-extras. ?
Thats funny, that is exactly what I always install. I love homerun, quickaccess and yaquake. that dolphin rootaccess i didnt know about which I think I will give it a shot
Great stuff :D
I am not able to install via any of these commands. I am getting error “could not get lock var/cache/apt/archives/lock-open (11:resource temporarily unavailable). Please give me any solution ASAP
“This is really the coolest thing to do after installing any linux distro. The permission system of linux does not allow you to write to other partitions without root privileges.”
how is that “coolest thing” I find it very annoying. Every Goddamn time I format a HDD or anything of the kind and I have to go into root to change the permissions to I can use the thing. Don’t get me wrong I love KDE but I haven’t had this issue on any other UI, Gnome, Unity, Mate, LXDE, XFCE, Cinnamon. do not have this issue. Even from OpenSUSE, Debian, Arch and others it only seems KDE has this. But because I like KDE over the rest of them, I live with it. Just wish there was a why to get rid of it.
so its cool to get rid of the annoying thing :)
But I am not sure if KDE is the only desktop having this issue. It related more to the setup process rather than the desktop environment. I see it on Xubuntu, Linux Mint Cinnamon too. Other partitions are made to belong to root by default.
Dropbox doesn’t just work.. In order to integrate in into dolphin you have to manually install the dropbox service menu which isn’t just a case of selecting it and clicking install.. Here’s a video on how to install it so that you have dropbox share links etc..
https://www.youtube.com/watch?v=wKQ7Z9x6CbQ
Not a bad list. But 18 is an overkill. 19 wasn’t necessary on my K12.04~
Good suggestions here. I personally find Firefox works better than Chrome however.