Debian webserver
Debian is a great choice for setting up linux webservers. According to current stats it is the most popular server OS followed closely by centos.
I am a great fan of the apt/dpkg/gdebi commands, which make it so easy to install and update packages on the system.
To setup a complete functional php webserver, you need to install a couple of extra things which include a webserver and a database. In this post we shall be setting up nginx, php, php-fpm, apc and MariaDB.
Nginx is a modern webserver, that has been designed to handle large amounts of traffic using the least amount of resources in terms of RAM and CPU.
Before nginx the traditional webserver used through out the internet was apache. However as the internet became more populated, the need for a faster and efficient webserver grew.
Nginx vs Apache
Apache by design is very bulky and has tons of features, most of which are not necessary for typical websites. It was probably designed to satisfy everyone's needs, but this ended up making it a large and heavy webserver with mostly unused features.
Nginx on the other hand is a very sleek and swift webserver that focuses entirely on speed, scalability, and efficiency.
The technicals of how it does so are large and beyond the scope of this post. May be we could take a look later on. Just for your information this website runs on nginx.
Now without any further discussion lets get to work.
1. Install Nginx on Debian
The nginx package is right there in the debian repositories so you dont have to look anywhere else. Fire up apt-get and install it.
# apt-get install nginx
Now launch the nginx server.
# service nginx start
Starting nginx: nginx.
Now access the nginx server from browser by opening the url
http://localhost/
and you should get the welcome message
Welcome to nginx!
Important notes
There are few things you should memorise to manage your nginx server better. The nginx configuration files are found in the following location
/etc/nginx/
root@localhost:/etc/nginx# ls
conf.d		koi-win		  naxsi.rules	scgi_params	 uwsgi_params
fastcgi_params	mime.types	  nginx.conf	sites-available  win-utf
koi-utf		naxsi_core.rules  proxy_params	sites-enabled
We shall not modify the nginx.conf file directly. Instead we create a separate configuration file for each vhost/site and save it in the following directories.
/etc/nginx/sites-available
/etc/nginx/sites-enabled
This is similar to apache. The sites-enabled directory contains the configurations for vhosts that are to be enabled. It contains symlinks to the corresponding configuration files in sites-available directory.
Setup a virtualhost
Now that we have installed nginx, its time to setup a virtual host. This is what you would be doing on a real webserver to setup your site.
Inside /etc/nginx/sites-available you would see a file named default. It is a template file to create your own configuration files. Just copy it and name it to your site.
# cp default binarytides.com
root@localhost:/etc/nginx/sites-available# ls
binarytides.com  default
We choose to name the configuration files with the site name, so that it is easier to remember and maintain.
Now open up binarytides.com and edit the things as per your need.
You would see a server block similar to this
server {
	#listen   80; ## listen for ipv4; this line is default and implied
	#listen   [::]:80 default_server ipv6only=on; ## listen for ipv6

	root /usr/share/nginx/www;
	index index.html index.htm;

	# Make site accessible from http://localhost/
	server_name localhost;
This first thing to configure here is the server_name. Name it to your site. For example
server_name binarytides.com
or
server_name binarytides.com www.binarytides.com
When someone opens binarytides.com in his browser, the http header contains this hostname which nginx would pickup and search for a matching server block. When a matching server block is found, it would use the configuration from that particular server block.
Another thing to configure is the web root directory for this site/vhost. Note that this is by default /usr/share/nginx/www which you might want to change to something else.
The general convention is to have a separate directory for each vhost. For example
/usr/share/nginx/www/binarytides.com/
/usr/share/nginx/www/google.com/
So create an appropriate directory and point the root setting in the configuration file to the directory.
...
root /usr/share/nginx/www/binarytides.com;
...
After doing these changes, save the configuration file and create a symlink the /etc/nginx/sites-enabled directory.
root@localhost:/etc/nginx/sites-available# ls
binarytides.com  default
root@localhost:/etc/nginx/sites-available# cd ..
root@localhost:/etc/nginx# cd sites-enabled/
root@localhost:/etc/nginx/sites-enabled# ln -s ../sites-available/binarytides.com
root@localhost:/etc/nginx/sites-enabled# ls
binarytides.com  default
root@localhost:/etc/nginx/sites-enabled#
Now test your new configuration
# nginx -t
nginx: [warn] conflicting server name "localhost" on 0.0.0.0:80, ignored
nginx: the configuration file /etc/nginx/nginx.conf syntax is ok
nginx: configuration file /etc/nginx/nginx.conf test is successful
The last line of the output must say successful, or some error would be shown. It might show some warnings which can be fixed later.
Finally restart nginx for the new configuration to take effect
# service nginx restart
Restarting nginx: nginx: [warn] conflicting server name "localhost" on 0.0.0.0:80, ignored
nginx.
root@localhost:/etc/nginx/sites-enabled#
So the new configuration has taken effect. Now create a new index.html file in the new web root of this virtual host and open it from the browser and it should work.
2. Install php and php-fpm
The next thing to install is the php interpreter and php-fpm. Php-FPM is dedicated fastcgi process manager for php that can interface or connect with any compatible webserver and manage php processes to process php requests.
Nginx <== communicates ==> Php-FPM <== manages ==> php child process
Install the necessary packages first.
# apt-get install php5 php5-fpm
It will automatically install the necessary dependencies. You can install php5-cli package also if you need the php command to run php scripts.
Php-fpm runs as a separate server and nginx communicates with it over a socket. Hence the php execution is totally outside the server. Also since fpm keeps php process persistent, it fully supports APC.
Now locate the php fpm configuration files. The files at located at
/etc/php5/fpm/
A pool is a bunch of php processes running with same user/group. So if you want the php files of each site to run with a separate user permission, then you need to create separate pools of fpm. For simplicity sake we just showing a single pool here.
The pool configuration files are inside the pool.d directory. Navigate in
root@localhost:/etc/php5/fpm/pool.d# ls
www.conf
Open the www.conf file which is again a template for you to use and create separate configuration files for each pool.
It looks something like this
; Start a new pool named 'www'.
; the variable $pool can we used in any directive and will be replaced by the
; pool name ('www' here)
[www]

; Per pool prefix
; It only applies on the following directives:
; - 'slowlog'
; - 'listen' (unixsocket)
; - 'chroot'
; - 'chdir'
; - 'php_values'
; - 'php_admin_values'
; When not set, the global prefix (or /usr) applies instead.
; Note: This directive can also be relative to the global prefix.
; Default Value: none
;prefix = /path/to/pools/$pool

; Unix user/group of processes
; Note: The user is mandatory. If the group is not set, the default user's group
;       will be used.
user = www-data
group = www-data

; The address on which to accept FastCGI requests.
; Valid syntaxes are:
;   'ip.add.re.ss:port'    - to listen on a TCP socket to a specific address on
;                            a specific port;
;   'port'                 - to listen on a TCP socket to all addresses on a
;                            specific port;
;   '/path/to/unix/socket' - to listen on a unix socket.
; Note: This value is mandatory.
listen = /var/run/php5-fpm.sock

; Set listen(2) backlog.
; Default Value: 128 (-1 on FreeBSD and OpenBSD)
;listen.backlog = 128
The above thing consists of comments mostly and the most important 4 lines are
1. [www]
this is the pool name

2. user = www-data
this is the user with whose permissions the php script would be run

3. group = www-data
this is the group

4. listen = /var/run/php5-fpm.sock
this is the socket for communicating with this pool. This socket must be given to nginx for nginx to be able to talk to fpm
Connect fpm with nginx
We are not going to change much here. Just note down the socket path. We have to put this into the nginx configuration file. Go back to your nginx configuration and open it again.
It contains a section for php fpm configuration which looks like this
# pass the PHP scripts to FastCGI server listening on 127.0.0.1:9000
#
#location ~ \.php$ {
#	fastcgi_split_path_info ^(.+\.php)(/.+)$;
#	# NOTE: You should have "cgi.fix_pathinfo = 0;" in php.ini
#
#	# With php5-cgi alone:
#	fastcgi_pass 127.0.0.1:9000;
#	# With php5-fpm:
#	fastcgi_pass unix:/var/run/php5-fpm.sock;
#	fastcgi_index index.php;
#	include fastcgi_params;
#}
Uncomment it and make it look like this
location ~ \.php$ {
	fastcgi_split_path_info ^(.+\.php)(/.+)$;
#	# NOTE: You should have "cgi.fix_pathinfo = 0;" in php.ini

#	# With php5-cgi alone:
#	fastcgi_pass 127.0.0.1:9000;
	# With php5-fpm:
	fastcgi_pass unix:/var/run/php5-fpm.sock;
	fastcgi_index index.php;
	include fastcgi_params;
}
Test PHP
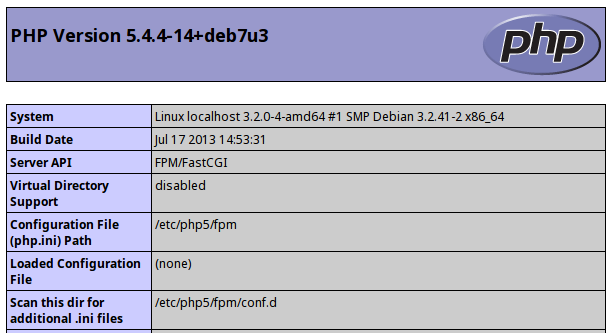
Now put up a file in the web root with the phpinfo call.
<?php

phpinfo();
And then open the file in browser and the php information block should come up, saying that php is setup and working correctly.
Another thing that you can do is add index.php to the index files list. So that when accessing a directory, if no file is specified, then index.php gets called.
root /usr/share/nginx/www/binarytides.com;
index index.html index.htm index.php;
Setup apc - alternate php cache
APC is a great way to speed up the execution of php scripts. Apc compiles php code and keeps the opcode in memory and uses it next time without compiling the same php code again from file. This drastically speeds up execution. Apart from opcode cache, apc also offers a user cache to store raw data for the php application in memory.
Php as of version 5.5 has new feature called OPcache which does the same thing as apc opcode cache thereby deprecating apc.
Setting up apc is very simple and quick. Just install the apc package for php
# apt-get install php-apc
Then restart php fpm
# service php5-fpm restart
Now check the phpinfo page again and it should have the apc details as well. The apc configuration file is located at
/etc/php5/fpm/conf.d/20-apc.ini
The configuration can be tweaked a bit for optimal performance for your needs. Here is the kind of configuration that I use
extension=apc.so

apc.enabled=1
apc.shm_size=128M
apc.ttl=3600
apc.user_ttl=7200
apc.gc_ttl=3600
apc.max_file_size=1M
Check the list of apc configuration parameters for more information.
3. Install MariaDB on Debian
Now comes the last and final component of the LEMP stack. That is the MariaDB database and not mysql. Well by now you should be knowing that mysql is in the hands of oracle and no more a community belonging. So major corps have started switching to mariadb. The good thing is that mariadb is binary compatible with mysql with lots of additional features. So if you are already using mysql for your php applications then shifting to mariadb would be absolutely hassle free.
MariaDB is not present in the debian repositories. To get the repositories visit the following page
https://downloads.mariadb.org/mariadb/repositories/Select Debian as the distro, Wheezy as the release and version 10.0 of mariadb. Then select a mirror on the right side. Now scroll down to the bottom of the page to find the repository details.
Here are the commands that I got
sudo apt-get install python-software-properties
sudo apt-key adv --recv-keys --keyserver keyserver.ubuntu.com 0xcbcb082a1bb943db
sudo add-apt-repository 'deb http://mirrors.fe.up.pt/pub/mariadb/repo/10.0/debian wheezy main'
Now update the apt cache and install the mariadb packages
sudo apt-get update
sudo apt-get install mariadb-server mariadb-client
While installation mariadb would ask for the password of user root. Enter the password and make sure not to forget.
After the installation finishes check your mariadb version
# mysql -V
mysql  Ver 15.1 Distrib 10.0.3-MariaDB, for debian-linux-gnu (x86_64) using readline 5.1
Note that the command name is same as with mysql. But the name mariadb is there in the version information.
Webserver is ready
So now the LEMP web server is ready to use. You may want to install a couple of extra goodies like phpmyadmin to manage your database better. Phpmyadmin is there in the debian repository so install it right from there.
Have any questions ? Feel free to comment below.
Can you update this narrative with current versions? Because at some point I got stuck and couldn’t move forward.
Thank you very much for this tutorial.
Thank you very much for this tutorial.
Hello,
I am still in the learning phase for setting up Linux web servers. Actually I am in a coding camp right now.
Your step by step explanations is easy to understand. I am also trying to implement MariaDB instead of Mysql on my website. https://www.natalastroloji.com
Learning how to code requires practice! Thank you!
Hello Silver Moon,
Is it working for 2018? Thank you for reply.
I don’t think it is necessary to install and configure apc and mariadb for LEMP stack on Debian. It can be done without it, like here: https://www.cloudways.com/blog/how-to-create-a-lemp-stack-on-debian-server/ The main packages to install are nginx, php, mysql, and phpfpm.
I used this tutorial for installing in Debian 8, I failed with others an I couldnt restart nginx, even after nginx t- kept telling me ok and successful, the solution: sudo fuser -k 80/tcp
Thanks for explaining better than other newer tutorials
still was a headache
still coming back thanks man
Nice tutorial, but installing each package manually may take a lot of my time and I am not sure what is the best approach to setup a server. Would recommend manually installing each package or using some platform, like Cloudways (https://www.cloudways.com/en/php-cloud-hosting.php ), where all the packages are pre-installed when you launch a server?
Where is mod rewrite settings? The tutorial is incomplete without rewrite being told. Please include nginx rewrite settings (especially for wordpress) in this article.
Great article. You don’t even need .htaccess for this setup. Great deal
Very useful. Thanks a lot ! The best article about nginx with php.
Just want to add that the service command does not work.
“service nginx start” will return the error “bash: service: command not found”.
Instead, use /etc/init.d/nginx start
You need to do “sudo service nginx start”
Be sure to install php5-mysql when installing php5 and php5-fpm as well. Greate article! I will be coming back many times I’m sure :)
This.Is.Awesome! I’ve been researching how I want to optimize my dedicated box to handle the most traffic before I have to scale and was looking at nginx and mariadb…then stumbled across this article! I and I’m sure many others thank you for posting this configuration!
still coming back thanks man.. one of the best tut specially for newbies like me :)
Hi Moon! When I opened phpinfo.php in iceweasel it showed “File not found”
———————
root@localhost:/home/thomas# cat /var/log/nginx.error.log
2013/12/21 15:50:26 [error] 3783#0: *1 FastCGI sent in stderr: “Primary script unknown” while reading response header from upstream, client: 127.0.0.1, server: localhost, request: “GET /gradesys.com/info.php HTTP/1.1”, upstream: “fastcgi://unix:/var/run/php5-fpm.sock:”, host: “localhost”
———————
I googled it and found some people could fix it with adding
“fastcgi_param SCRIPT_FILENAME $document_root$fastcgi_script_name;” into vhost file, I tried but it seemed not work
paste your nginx configuration file on gist.github.com
Thank you! I pasted it at
https://github.com/Thomas-Peng/nginx-configuration-file/blob/master/mysite.com
I pasted my nginx configuration file on
https://github.com/Thomas-Peng/nginx-configuration-file/blob/master/mysite.com
Thanks a lot man.. As you’ve said above.. it’s almost the
The perfect LEMP server
and don’t forget to add that part where to cgi.fix_pathinfo to zero
since it was 1 for me!!! Can’t thank you enough man.. just finished with no errors.. Genius ;)
After installing php I opened my site with Iceweasel then a dialog box came up saying “You have chosen to open index.php which is a: PHP script…Would you like to save this file”…I do almost the same as the tutorial until “Test PHP”…
If the file is getting downloaded, it means that nginx is not running the file as php. Check the nginx logs for more information
# cat /var/log/nginx/error.log
Also make sure that php-fpm is running.
# service php5-fpm status
Both the above commands should be run as root.
Hey Silver! glad to see your reply and I’ve got a little tough here:
I ran both commands as root and get this:
——————————————————
root@debian:~# cat /var/log/nginx/error.log
2013/12/11 21:14:25 [error] 2809#0: *1 directory index of “/usr/share/nginx/www/msite.com/” is forbidden, client: 127.0.0.1, server: localhost, request: “GET /msite.com/ HTTP/1.1”, host: “localhost”
root@debian:~# service php5-fpm status
[ ok ] php5-fpm is running.
———————————
so I think it’s the permission problem, and I ran “chmod a+rx -R /usr/share/nginx/www/msite.com/index.php” to make it accessible, but it didn’t work.
—————————————————————–
root@debian:/usr/share/nginx/www/msite.com# ls -l
total 8
-rw-r–r– 1 root root 100 Dec 11 23:39 index.html
-rwxr-xr-x 1 root root 21 Dec 9 23:45 index.php
root@debian:~# namei -l /usr/share/nginx/www/msite.com/index.php
f: /usr/share/nginx/www/msite.com/index.php
drwxr-xr-x root root /
drwxr-xr-x root root usr
drwxr-xr-x root root share
drwxr-xr-x root root nginx
drwxr-xr-x root root www
dr–r–r– root root msite.com
-rwxr-xr-x root root index.php
————————————-
Now the 403 forbidden erro is still happening and Im confused…
The directory www and mysite.com does not have the write permission for group/world. try setting read+write permission for group+world on directory www and mysite.com
I set read+write permission for all users on directory www and msite.com, then:
—————————————————————————————————-
root@debian:/home/thomas# namei -l /usr/share/nginx/www/msite.com/
f: /usr/share/nginx/www/msite.com/
drwxr-xr-x root root /
drwxr-xr-x root root usr
drwxr-xr-x root root share
drwxr-xr-x root root nginx
drwxrwxrwx root root www
drwxrwxrwx root root msite.com
—————————————-
There’re two files in directory msite.com: “index.html” and “index.php”
—————————————————————————————-
root@debian:/home/thomas# ls -l /usr/share/nginx/www/msite.com
total 8
-rw-r–r– 1 root root 76 Dec 12 21:20 index.html
-rwxrwxrwx 1 root root 21 Dec 9 23:45 index.php
root@debian:/home/thomas#
————————————-
Then “http://localhost/msite.com/” could access to index.html,
but “http://localhost/msite.com/index.html” would turn to “Welcom to nginx!”,
and “http://localhost/msite.com/index.php” would start the php file download again…
——————————————————————————————————–
Now I’m trying to install the stuff over again…
paste the contents of your nginx vhost configuration file.
use https://gist.github.com/
Thank you for your patience! I put my vhost file at
https://gist.github.com/anonymous/7955178
The server_name should be localhost if you are accessing from localhost.
server_name msite.com, http://www.msite.com;
should be
server_name localhost;
Yes! I modified this and it’s working now, thank you very much~
Thanks. Unfortunately not complete since you forgot to set the cgi.fix_pathinfo to zero..
but a nice tut though..
If you encounter error “test failed” on testing nginx after making vhost, remove “default” symlink in ./sites-enabled. Works on me
nice test. thank you man.
Thank you very much for this tutorial.
When trying to install phpmyadmin apt seems to want to pull the apache2 server!
Anyway to install phpmyadmin without apache?
there should be a php5-mysql
I think I need some clarification. When I get to the “Connect fpm with nginx” part it seems unclear. It says
“We are not going to change much here. Just note down the socket path. We have to put this into the nginx configuration file. Go back to your nginx configuration and open it again.”
Is this the “vhost” server file that was created in the ./sites-avaiable directory or the nginx.conf file found in /etc/nginx/? The code looks like what belongs in the “vhost” server file. Either way, I tried the code in both files seperately and it didn’t work for me. Could this be elaborated upon? I would greatly appreciate it.
It is the vhost configuration file that is in the sites-available directory.
to enable make sure that the vhost configuration file is also present inside the sites-enabled directory, this can be done easily by creating a symlink.